I’d like to share my journey discovering how to use SonarQube.
In this post I’ll go through the basics of SonarQube using their cloud offering (SonarCloud), though, I’m guessing most of what I’ve written should also apply to the on-premise version.
In this blog post I’ll keep it simple and focus on the getting started with SonarQube part. Later on I plan to get into more detail on stuff like “rules”, “measures”, “metrics” and build server integration.
You can check out the source code analyzed at github.
Table of contents
- What is SonarQube
- Step 1: Creating a SonarCloud account
- Step 2: Setup tools
- Step 3: Execute our first run
- Step 4: Taking a look at the results
- Conclusion
What is SonarQube
As far as I understand SonarQube is a tool that helps you analyze code quality using static analysis.
You can create rulesets used for inspection and define quality gates (this allows you to set minimum standards for acceptable quality).
It is able to detect code smells, several security vulnerabilities and help detecting bugs.
I also love their fixing the water leak analogy, it seems like a good way to approach technical debt.
Making technical debt and quality issues visible and comparing the evolution over time seems incredibly useful.
Step 1: Creating a SonarCloud account
To create a project in SonarCloud, you should create your account at this page, which is free for open source projects. (the self hosted community version is free, a paid commercial version with extra features / languages / support is available as well)
After creating your account you should retrieve 2 pieces of information in the SonarQube’s account section.
You can navigate to this section using the menu in the top right corner.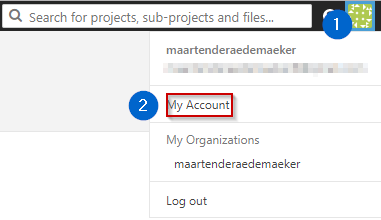
You will need:
- Your organization
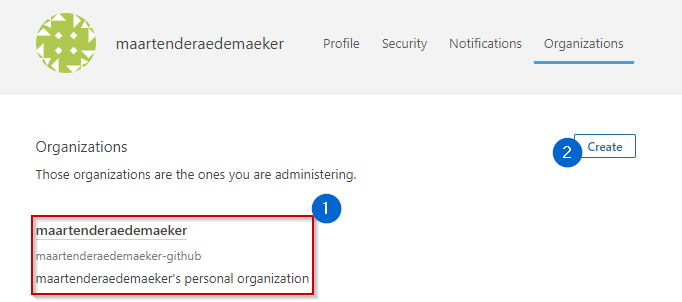
You can copy it from the section marked in the image above with “1”, or create one using the create button marked with “2”.
In my case: “maartenderaedemaeker-github”.
- An authentication token
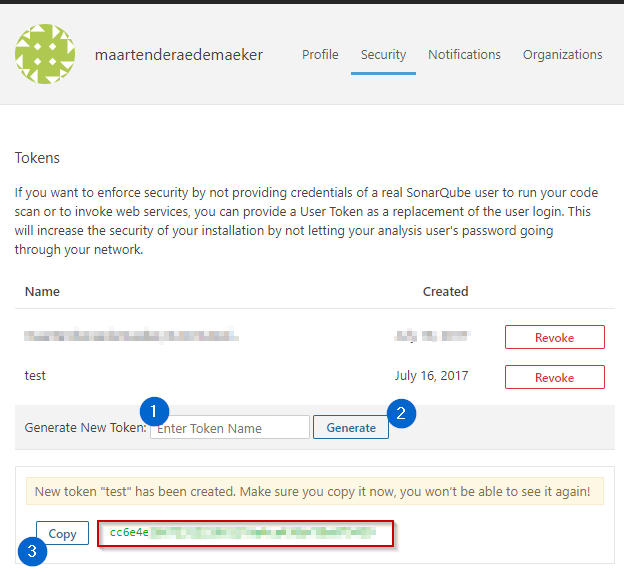
The token can be generated and copied from the security tab. Make sure to copy-paste it somewhere, because we’ll need it in the next step.
Step 2: Setup tools
To be able to run the SonarQube msbuild analyzer we need to have 2 command line tools in our path.
- msbuild
If you have Visual Studio installed you can find your installation directory by executing ‘C:\Program Files (x86)\Microsoft Visual Studio\Installer\vswhere.exe’1
2# In powershell window
& 'C:\Program Files (x86)\Microsoft Visual Studio\Installer\vswhere.exe'
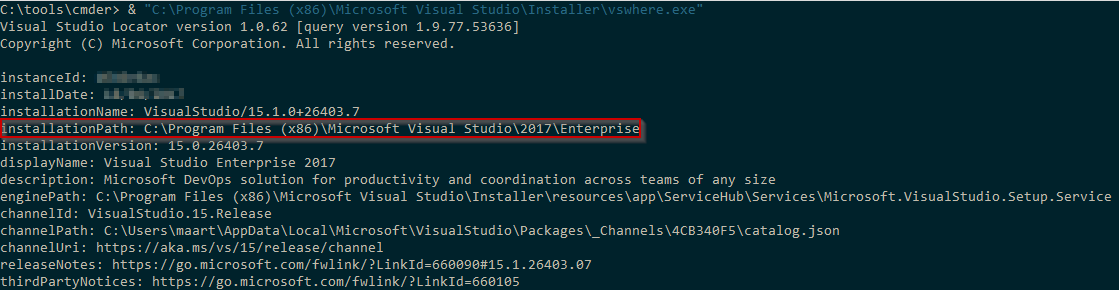
In my case it’s “C:\Program Files (x86)\Microsoft Visual Studio\2017\Enterprise”, so I’d add “C:\Program Files (x86)\Microsoft Visual Studio\2017\Enterprise\MSBuild\15.0\Bin” to my “PATH” environment variable.
Otherwise you can download “Build tools for Visual Studio 2017” from Microsoft, and add the path to the bin folder to your “PATH” environment variable.
- SonarQube Scanner for MSBuild
You can download the SonarQube Scanner for MSBuild here.
I’ve extracted the zip file to my ‘C:\tools’ directory and added the folder containing the binaries to my PATH variable.
Verify the tools are working by opening a new commandline or powershell window and verifying that the tools are found:1
2msbuild /?
SonarQube.Scanner.MSBuild /?
If you get output explaining how to use the tools, your PATH variable is set correctly. If not, verify if the directories are in your PATH variable, re-open a commandline window and try again.
You also need to install Java Runtime Environment 8 and .NET Framework v4.5.2 or higher.
Great! We are now ready to run our first analysis.
Step 3: Executing our first run
We need to run 3 commands to execute an analysis.
Command 1: Prepare for analysis, generate rulesets, hook into msbuild.
In this step you will need to use the access token and organization name generated in step 1.
You also need to pick a unique project name.1
2
3
4
5SonarQube.Scanner.MSBuild.exe begin
/k:"PROJECT_NAME_HERE"
/d:"sonar.host.url=https://sonarcloud.io" # or replace with on-prem URL
/d:"sonar.login=ACCESS_TOKEN_HERE"
/d:"sonar.organization=ORGANIZATION_NAME_HERE"
Command 2: Now it’s time to execute msbuild.1
msbuild /t:Rebuild
Command 3: Time to finish up the analysis. (Do not forget to replace the access token placeholder below)1
SonarQube.Scanner.MSBuild.exe end /d:"sonar.login=ACCESS_TOKEN_HERE"
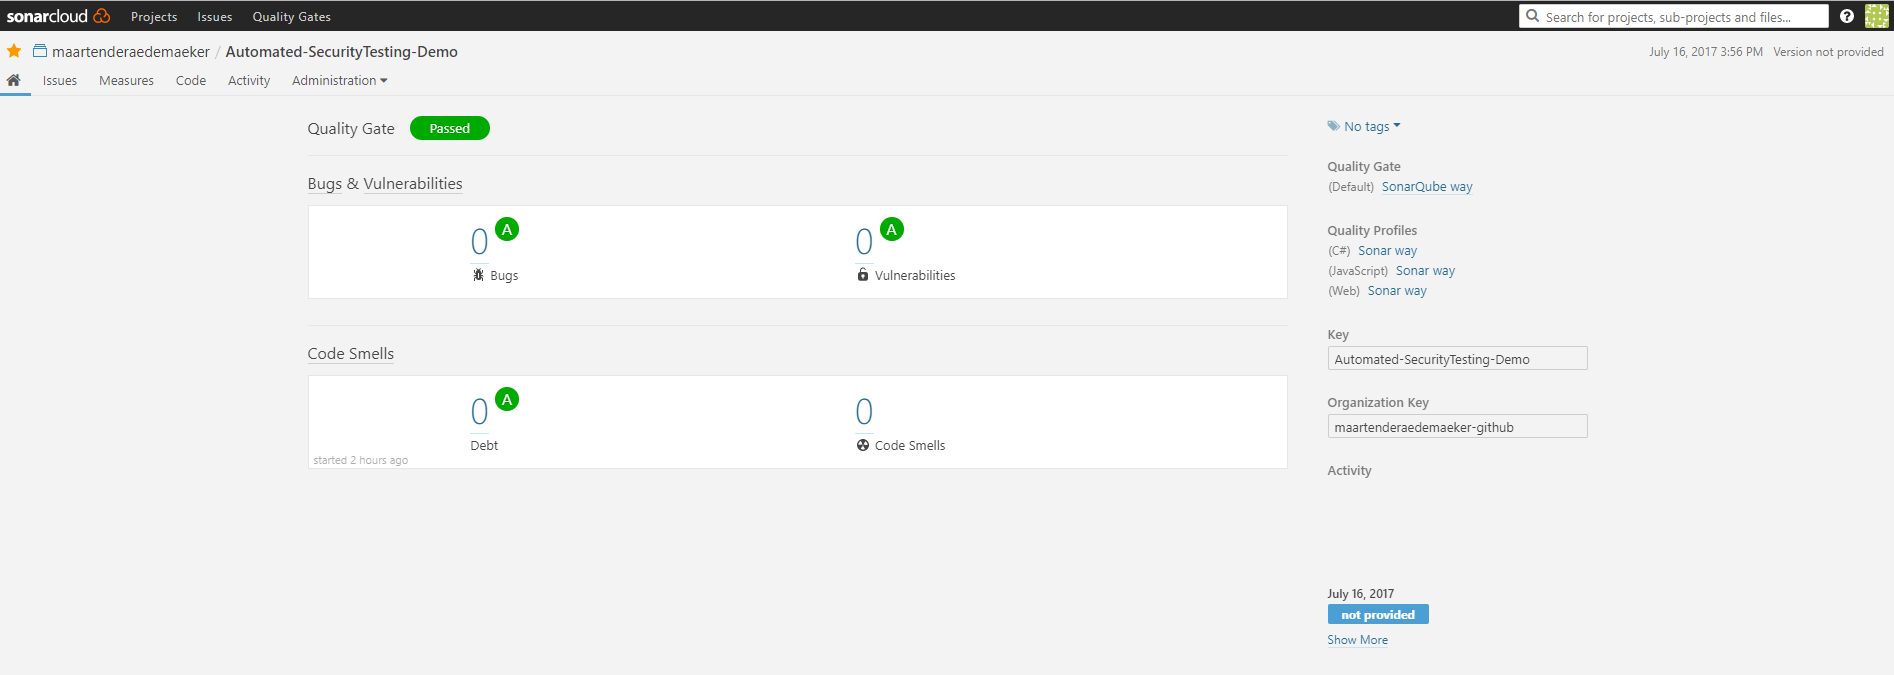
Step 4: Taking a look at the results
After this first run you can go to your dashboard and you should be able to find a project with the name defined in ‘Command 1’.
Because I did not provide any custom rulesets, SonarQube will use a default set.
Since the project is just the basic ASP.NET MVC template, the quality gates passed, 0 bugs, vulnerabilities and code smells are found.
Conclusion
It’s pretty easy to get started with SonarQube using SonarCloud.
It seems like a very interesting tool to be able to get technical debt and code quality measurable over time.
I will definitely take a look at it in more detail.